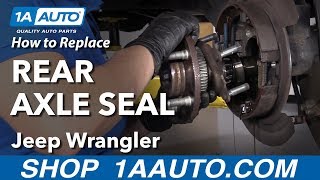
Jeep Wrangler Axle Seal Replacement this procedure will cover most solid front axle Jeeps. These Dana 30 & Dana 44 axles that Jeep used are all very similar as far as how to replace the axle seals. These axles were used in many different Jeep models including the TJ, JK, & JL Wrangler, XJ Cherokee, and the ZJ Grand Cherokee.
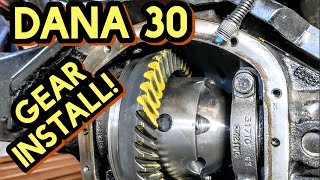
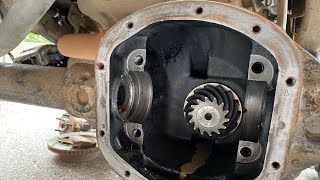
To replace the seals in one of these axles the procedure is basically the same. You need to remove both wheel bearings and axles. Next, the differential cover needs to be removed and the ring gear and differential (carrier) needs to be removed. This will expose the seals. The seals are located inside the axle pumpkin. The seals can be driven out with a long pry bar and I installed my seals using a special press tool.
Here are the parts and tools that I used in this video:
Axle Seal (03-18 Wrangler): https://amzn.to/3p0Ui1X
Axle Locker Plug (JK Rubicon): https://amzn.to/34tur9E
Axle Seal Install Tool (Dana 30 & 44): https://amzn.to/3vvwKEQ
Differential Gasket Dana 30: https://amzn.to/3fsobFc
Differential Gasket Dana 44: https://amzn.to/3fxALTU
RTV: https://amzn.to/3fXfmCB
Gear Oil: https://amzn.to/3wJB0AY
Astro "Big Nasty" Air Hammer: https://amzn.to/3fxe8P6
My Amazon Store: https://www.amazon.com/shop/repairgeek
Help support the channel, buy using my Amazon links
As an Amazon Associate I earn from qualifying purchases and your cost is exactly the same.
Questions? Shoot me an email at [email protected]
Contents:
00:00 Intro
00:36 Brake Disassembly
2:54 Wheel Bearing Removal
7:33 Axle Removal
8:35 Differential Cover Removal
10:00 Axle Locker Plug
12:39 Differential Removal
14:32 Seal Removal
15:40 Seal Install
17:38 Differential Install
18:50 Locker Plug Install
19:35 Differential Cover Install
20:31 Oil Fart
20:39 Axle Install
21:23 Wheel Bearing Intall
22:00 Brake Assembly
22:26 Outro
23:09 SUBSCRIBE!
Disclaimer:
The information, demonstration and any content contained in this video is for informational purposes only. The user Repair Geek makes no warranty, express or implied, regarding the effectiveness or safety of the contents of this video. In no way should the contents of the video, including the tools used, be repeated or tried by anyone. Viewers should only seek the help of a trained professional located at a licensed auto repair shop for any fix, modification, alteration, or any change to their vehicle. Repair Geek shall not be liable for any injury, damage, or loss to any person or property that may result from use of the tools, equipment, or any content contained in this video. In addition, there is no way to guarantee that the video is not altered or modified or is not in the final form submitted by Repair Geek and therefore, Repair Geek does not warrant that the video is unaltered or not modified. The links on this video to products are for informational purposes only and in no way are an endorsement of the safety or effectiveness of the particular product. Viewers understand that anything contained in this video or linked to or from this video is the sole responsibility of the viewer and in no way provides an express or implied warranty as to the safety or effectiveness of any linked tool, product, or video. Therefore, viewer agrees to release, waive, and discharge Repair Geek or anyone affiliated with Repair Geek, from any and all liability, claims, demands, actions, and causes of action whatsoever arising out of or related to any loss, damage, or injury, including death, that may be sustained by the viewer, or to any property belonging to viewer, regardless of whether the loss is linked to the use of the contents of this video, or otherwise and regardless of whether such liability arises in tort, contract, strict liability, or otherwise, to the fullest extent allowed by law.


Информация по комментариям в разработке