Click for more info and reviews of this CURT Trailer Hitch:
https://www.etrailer.com/Trailer-Hitc...
https://www.etrailer.com
Don’t forget to subscribe!
/ etrailertv
Full transcript: https://www.etrailer.com/tv-install-t...
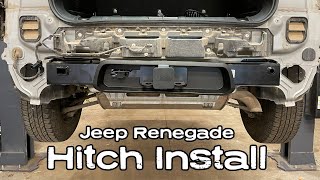
Hi, everyone. Aiden here at etrailer. Today we're gonna be taking a look at and showing you how to install this CURT Class 3 Custom Fit Trailer Hitch Receiver on our 2023 Hyundai Santa Cruz. With this being a Class 3 hitch, it's gonna give us the most versatility with accessories. It's got a two inch by two inch receiver tube opening. It's gonna make it really easy to match up with a ball mount if we're towing a small trailer, bike racks, cargo carriers, or any other hitch mounted accessories.
It's gonna use a standard five eighths inch hitch pin and clip. Now, it's not included with the hitch itself, but most accessories are gonna come with something. Bike racks will come with an anti-rattle device. Same with cargo carriers for the most part. But just watch out for that, if you don't already have one of these or an accessory, make sure that it comes with one, because the hitch does not include one.
And then the safety chain loops at the bottom, these are gonna work with most standard hooks, or some of the latching clevis style as well. This has a 5,000 pound gross trailer weight rating. That's how much it can pull. And then a 750 pound max tongue weight. That's the maximum downward pressure on the end of the receiver tube.
Both of those are important to know if you do plan on towing a small trailer, but the tongue weight in particular is important for other hitch mounted accessories, like maybe a cargo carrier or a bike rack. If you've got a cargo carrier, a lot of those are rated for 500 pounds. So with a 750 pound tongue weight, you're gonna be good to go to fully load that up so long, as your Santa Cruz is rated for that kind of weight. Some measurements to keep in mind. From the ground to the top inside edge of the receiver tube opening, it's going to be 14 inches.
That'll let us know things like ground clearance for accessories that we're putting in here, or what kind of rise or drop we might need in a ball mount to make sure that our trailer is level. The other thing to note is the center of the hitch pin hole to the outer edge of the vehicle, which for us today is three and a half inches. That'll let us know if we have clearance for folding accessories like a bike rack. They tend to have folding features for storage when they're not in use. So if you're the type of person to leave it on the back of your vehicle between rides, you wanna know if you've got clearance for it. And with three and a half inches, I think it'll be more than good enough. And now the only thing left to worry about is the install. And it's a really simple process. No drilling required. It just uses factory weld nuts on the frame rail, so it really just bolts up into place. The only thing you need to worry about leading into that is just making sure that you lower the spare tire and the exhaust to give yourself a little more room to work. But it's pretty straightforward and we will walk you through it right now. We're gonna start the installation by lowering the spare tire down using a half inch socket. We'll just let that down so we have some extra room to work. Now we're gonna need to lower the exhaust. This again is just going to give us more room to work. So grab yourself something like a cam buckle strap to support the exhaust when you lower it. If you're on the ground, you can use blocks too. But we'll hook this onto the coil springs on both sides and draw some tension on it until it touches the exhaust. And we'll lower these hanger brackets and pop off the isolators here and by the exhaust tip at the end there, using some spray to just make it a little easier on us. Now you can use a pry bar to make this a little easier on yourself. It's kind of hard to find the right angle, but once you get that initial bit popped out, you can maybe grab it by hand or just continue to use that pry bar until that rubber isolator releases from the post. And we'll repeat that on the other one. Once all the hangers are popped off, then you can use the strap to lower down the exhaust gently, and give ourselves a little more room to work. The mounting holes are gonna be located on the frame rail on either side. One at the bottom, two on the sides, and it'll be the same on the passenger side. Just know that you've got the exhaust in the way. Now, depending on the age of your vehicle, you might need to go through with a tube brush and some penetrating oil, and just clean these threads out because they are exposed. And if the vehicle's a little bit older, then they probably need cleaned. Right now, this truck is pretty new, so I'm just gonna take the hardware and see if it threa


Информация по комментариям в разработке